Hi, Im Carrie Anne, and welcome to CrashCourse
Computer Science! Weve talked a lot about inputs and outputs
in this series, but theyve mostly been between different parts of a computer like
outputting data from RAM or inputting instructions to a CPU. We havent discussed much about inputs coming
from humans. We also havent learned how people get information
out of a computer, other than by printing or punching it onto paper. Of course, theres a wide variety of input
and output devices that allow us users to communicate with computers.
They provide an interface between human and
computer. And today, theres a whole field of study
called Human-Computer Interaction. These interfaces are so fundamental to the
user experience that theyre the focus of the next few episodes. INTRO As we discussed at the very beginning of the
series, the earliest mechanical and electro-mechanical computing devices used physical controls for
inputs and outputs, like gears, knobs and switches, and this was pretty much the extent
of the human interface.
Even the first electronic computers, like
Colossus and ENIAC, were configured using huge panels of mechanical controls and patch
wires. It could take weeks to enter in a single program,
let alone run it, and to get data out after running a program, results were most often
printed to paper. Paper printers were so useful that even Babbage
designed one for his Difference Engine, and that was in the 1820s! However, by the 1950s, mechanical inputs were
rendered obsolete by programs and data stored entirely on mediums like punch cards and magnetic
tape. Paper printouts were still used for the final
output, and huge banks of indicator lights were developed to provide real time feedback
while the program was in progress.
Its important to recognize that computer
input of this era was designed to be as simple and robust as possible for computers. Ease and understanding for users was a secondary
concern. Punch tape is a great example this was
explicitly designed to be easy for computers to read. The continuous nature of tape made it easy
to handle mechanically, and the holes could be reliably detected with a mechanical or
optical system, which encoded instructions and data.
But of course, humans dont think in terms
of little punched holes on strips of paper. So, the burden was on programmers. They had to spend the extra time and effort
to convert their ideas and programs into a language and a format that was easy for computers
of the era to understand often with the help of additional staff and auxiliary devices. Its also important to note that early computers,
basically pre-1950, had an extremely simple notion of human input.
Yes, humans input programs and data into computers,
but these machines generally didnt respond interactively to humans. Once a program was started, it typically ran
until it was finished. Thats because these machines were way too
expensive to be waiting around for humans to type a command or enter data. Any input needed for a computation was fed
in at the same time as the program.
This started to change in the late 1950s. On one hand, smaller-scale computers started
to become cheap enough that it was feasible to have a human-in-the loop; that is, a back
and forth between human and computer. And on the other hand, big fancy computers
became fast and sophisticated enough to support many programs and users at once, what were
called multitasking and time-sharing systems. But these computers needed a way to get input
from users.
For this, computers borrowed the ubiquitous
data entry mechanism of the era: keyboards. At this point, typing machines had already
been in use for a few centuries, but it was Christopher Latham Sholes, who invented the
modern typewriter in 1868. It took until 1874 to refine the design and
manufacture it, but it went on to be a commercial success. Sholes typewriter adopted an unusual keyboard
layout that you know well QWERTY named for the top-left row of letter keys.
There has been a lot of speculation as to
why this design was used. The most prevalent theory is that it put common
letter pairings in English far apart to reduce the likelihood of typebars jamming when entered
in sequence. Its a convenient explanation, but its
also probably false, or at least not the full story. In fact, QWERTY puts many common letter pairs
together, like TH and ER.
And we know that Sholes and his team went
through many iterations before arriving at this iconic arrangement. Regardless of the reason, the commercial success
of Sholes typewriter meant the competitor companies that soon followed duplicated his
design. Many alternative keyboard layouts have been
proposed over the last century, claiming various benefits. But, once people had invested the time to
learn QWERTY, they just didn't want to learn something new.
This is what economists would call a switching
barrier or switching cost. And its for this very basic human reason
that we still use QWERTY keyboards almost a century and a half later! I should mention that QWERTY isnt universal. There are many international variants, like
the French AZERTY layout, or the QWERTZ layout common in central Europe. Interestingly, Sholes didnt envision that
typing would ever be faster than handwriting, which is around 20 words per minute.
Typewriters were introduced chiefly for legibility
and standardization of documents, not speed. However, as they became standard equipment
in offices, the desire for speedy typing grew, and there were two big advances that unlocked
typings true potential. Around 1880, Elizabeth Longley, a teacher
at the Cincinnati Shorthand and Type-Writer Institute, started to promote ten-finger typing. This required much less finger movement than
hunt-and-peck, so it offered enhanced typing speeds.
Then, a few years later, Frank Edward McGurrin,
a federal court clerk in Salt Lake City, taught himself to touch-type; as in, he didnt
need to look at the keys while typing. In 1888, McGurrin won a highly publicized
typing-speed contest, after which ten-finger, touch-typing began to catch on. Professional typists were soon able to achieve
speeds upwards of 100 words per minute, much faster than handwriting! And nice and neat too! So, humans are pretty good with typewriters,
but we cant just plunk down a typewriter in front of a computer and have it type they
have no fingers! Instead, early computers adapted a special
type of typewriter that was used for telegraphs, called a teletype machine. These were electromechanically-augmented typewriters
that could send and receive text over telegraph lines.
Pressing a letter on one teletype keyboard
would cause a signal to be sent, over telegraph wires, to a teletype machine on the other
end, which would then electromechanically type that letter. This allowed two humans to type to one another
over long distances... Basically a steampunk version of a chat room. Since these teletype machines already had
an electronic interface, they were easily adapted for computer use, and teletype computer
interfaces were common in the 1960s and 70s.
Interaction was pretty straightforward. Users would type a command, hit enter, and
then the computer would type back. This text conversation between a user
and a computer went back and forth. These were called command line interfaces,
and they remained the most prevalent form of human-computer interaction up until around
the 1980s.
Command Line interaction on a teletype machine
looks something like this. A user can type any number of possible commands. Lets check out a few, beginning with seeing
all of the files in the current directory were in. For this, we would type the command, ls,
which is short for list, and the computer replies with a list of the files in our current
directory.
If we want to see whats in our secret
StarTrek Discovery Cast dot t-x-t file, we use yet another command to display the
contents. In unix, we can call cat - short for
concatenate. We need to specify which file to display,
so we include that after the command, called an argument. If youre connected to a network with other
users, you can use a primitive version of a Find My Friends app to get more info on
them with the command finger.
Electromechanical teletype machines were the
primary computing interface for most users up until around the 1970s. Although computer screens first emerged in
the 1950s, and were used for graphics they were too expensive and low resolution for
everyday use. However, mass production of televisions for
the consumer market, and general improvements in processors and memory, meant that by 1970,
it was economically viable to replace electromechanical teletype machines with screen-based equivalents. But, rather than build a whole new standard
to interface computers with these screens, engineers simply recycled the existing text-only,
teletype protocol.
These machines used a screen, which simulated
endless paper. It was text in and text out, nothing more. The protocol was identical, so computers couldnt
even tell if it was paper or a screen. These virtual teletype or glass teletype machines
became known as terminals.
By 1971, it was estimated, in the United States,
there was something on the order of 70,000 electro-mechanical teletype machines and 70,000
screen-based terminals in use. Screens were so much better, faster and more
flexible, though. Like, you could delete a mistake and it would
disappear. So, by the end of the 1970s, screens were
standard.
You might think that command line interfaces
are way too primitive to do anything interesting. But even when the only interaction was through
text, programmers found a way to make it fun. Early interactive, text-based computer games
include famous titles like Zork, created in 1977. Players of these sorts of early games were
expected to engage their limitless imaginations as they visualized the fictional world around
them, like what terrifying monster confronted them when it was pitch black and you were
likely to be eaten by a grue.
Lets go back to our command line, now on
a fancy screen-based terminal, and play! Just like before, we can see whats in our
current directory with the ls command. Then, lets go into our games directory
by using the cd command, for change directory. Now, we can use our ls command again
to see what games are installed on our computer. Sweet, we have Adventure! All we have to do to run this program is type
its name.
Until this application halts, or we quit it,
it takes over the command line. What youre seeing here is actual interaction
from Colossal Cave Adventure, first developed by Will Crowther in 1976. In the game, players can type in one- or two-word
commands to move around, interact with objects, pickup items and so on. The program acts as the narrator, describing
locations, possible actions, and the results of those actions.
Certain ones resulted in death! The original version only had 66 locations
to explore, but its widely considered to be the first example of interactive fiction. These text adventure games later became multiplayer,
called MUDs or Multi-User Dungeons. And theyre the great-forbearers of the
awesome graphical MMORPGs (massive, multiplayer online role playing games) we enjoy today. And if you want to know more about the history
of these and other games weve got a whole series on it hosted by Andre Meadows! Command line interfaces, while simple, are
very powerful.
Computer programming is still very much a
written task, and as such, command lines are a natural interface. For this reason, even today, most programmers
use command line interfaces as part of their work. And theyre also the most common way to
access computers that are far away, like a server in a different country. If youre running Windows, macOS or Linux,
your computer has a command line interface one you may have never used.
Check it out by typing cmd in your Windows
search bar, or search for Terminal on Mac. Then install a copy of Zork and play on! So, you can see how these early advancements
still have an impact on computing today. Just imagine if your phone didnt have a
good ol fashioned QWERTY keyboard. It could take forever to type your Instagram
captions.
But, theres still something missing from
our discussion. All the sweet sweet graphics! Thats our topic for next week. See you soon..
What's up, guys? I'm Jamila Mustafa
with BET Social and I'm here with... Janelle Monae and I just pulled up. - Pulled up.
- Skrrt skrrt. I like that Car brake.
Alright, so of course, the fit is fly. - You know, and so I had to come...
- Thank you. I had to come with my best, you know,
I still cannot hold a candlestick. You talk about
what you're getting excited for and your everyday life
is pretty much preparing for when Dirty Computer is gonna hit
and it's here and so...
For those that have seen it, of course,
you know, they may have so many questions like me,
I feel like I'm watching a movie, I gotta keep going back
and putting together pieces. But for those that have yet
to turn on their computers, what are they in store for? You know, I knew that I needed
to make this album before I even released my first album,
The ArchAndroid. I felt a responsibility
to the story of Cindi Mayweather and if you haven't heard The ArchAndroid
and The Electric Lady, it centers around an android
that is set in 2719. A heroic, protagonist, messiac figure
and Dirty Computer is more near future.
It's more... More about Janelle Monae,
it comes from a very honest, a deeply vulnerable place and I think
that's why it took me a while to do it. 'Cause I dunno if I was really ready
to go there, I needed to live with me, I needed to have experiences. I needed-- yeah, I needed to be inspired,
I needed to-- to just be, you know, I needed to be patient with myself.
I didn't wanna come out
with another project until I had something to say
and I do have a lot to say. I think this album deals with
what it means to come from the dirt. Like, we come from the dirt. When we go on to another frequency,
in my opinion, our physical selves
will go back to the dirt.
I also had this dream, this whole thought
when I was making the project, about how we are computers,
how our brains are CPUs. How we're uploading, we're downloading,
we're processing, we're transmitting information
back and forth. And some of us were told that
the way we were created hold these bugs and these viruses,
these things that make us unique. Whether it's our sexuality,
whether it's because we're black, whether it's because we're women,
whether it's because we're poor.
You know, I'm just naming a few
of these marginalized groups, but some people say that those are bugs,
those are viruses and Dirty Computer is saying, "No, those are our attributes,
those are features." You know,
this helps make the world better. And I tell you, electric,
is the first word I thought. I mean, from start to finish,
it is electric. But let's talk about-- I don't wanna keep talking about stuff
that some of you guys didn't see yet.
- So hurry up and see it.
- But go see it. Let's talk about something
that we've all seen and we all love, it inspired my pants today. - Now, come on now, the "Pynk"!
- Yes, I love those pants! - Whoa, that video.
- Yes, thank you. So different, but yet so you and I was kinda nervous watching it like,
"Should I see this part or...?" But it was beautiful at the same time,
it was-- it was-- I dunno how I felt watching it,
how did you feel making it? Man, I felt free, I felt liberated,
I felt...
Celebratory, I felt...
I felt supported. I was around a lot of black girl magic. If you look at the visual and
if you even watch the emotion picture, it's full of black girl magic. You know, people like you,
you know, people like-- All these women who are in this room
really inspired Dirty Computer and I wanted to make an anthem for us,
you know, all of us.
No matter if you were or were not born,
you know, as a woman. I think that we can still come together
and unite and when we come together, it's a beautiful thing. And I gotta say this, in your videos,
on tour, when you hit the stage, you, like you said,
you always incorporate women and you have like, a gang of girls
that are like, super dope and just as cool as you are. In your real life, do you have
your core group of girlfriends? Absolutely, yeah, I think that--
That "Pynk" mirrors, you know, the type of women that I hang out with.
We support each other,
we love each other. I don't wanna give away too much. I think it's so fresh,
people need to listen to the project, listen to the music, listen, you know,
to the emotion picture and just take it in, you know,
I don't wanna talk over it. But, what I will say is this project
is a bit more vulnerable and honest and, I mean, if you listen to songs
like "Django Jane", if you listen to "Pynk",
if you listen to "Make Me Feel", I didn't filter myself much,
I usually do a lot of self editing.
Like going into the studio
before I record and I'm like, "I don't wanna talk about this,
I don't wanna talk about that." And then I end up
not recording anything. But this time I told myself that,
edit after. You know, allow yourself
that place of freedom. - I have to just ask one more question,
- Sure.
Because I absolutely
love the film entirety. One of my favorite outfits was a-- You had a little jacket on,
it was a crop top jacket, it was like pink see-through. So many looks were definitely
in this entire visual, can you just give me one item of clothing
that you absolutely loved, that you definitely think
is going to be a signature piece? Oh gosh, that's really hard! I mean, you have the... The looks in "Pynk",
I think you're talking about "Screwed", then "Make Me Feel", "Django Jane".
It's really difficult. It's a difficult one,
you tell me which looks you like. - You like the jacket?
- I love the jacket. I love that jacket too, it's a red,
see-through, kinda plastic, yeah.
It's very afro-futuristic
but it's like 80s... What size is it, girl?
Is that small? - You can borrow it.
- Ohh! - Alright then.
- I'll let you borrow it. There we go and you guys
are gonna have to get your own! Because she only has one for me. So don't forget to check it out,
make sure you check it out and I'm proud of everything
that you do.
- Thank you so much for pulling up.
- Thank you, I'm humbled. Guys, I am Jamila Mustafa and we are here with the beautiful
and talented Janelle Monae and she just pulled up..
- So here's a question, what's a computer? - What's a computer? - Now I know it's really a huge question and it's also a really obvious question. We all kind of know what a computer is. So I have a better question, which is what is a computer going to become in the next couple of years? A bunch of companies are actually trying to evolve what we think of as a computer and I've been using all
four of the major options for the past year and
phew, what a computer is going to become is a harder question than you might think. (Upbeat music) Now in this video, we are going to compare a Surface Pro, an iPad Pro, a MacBook Pro, and a Pixelbook.
I have a lot of thoughts
that we're gonna come back to but I wanna start with
that question from earlier. The one that was inspired
by that Apple commercial. You know the one. A teenager bicycles around the streets of New York and uses her iPad to just sort of hang out and do her homework.
And it also has this
moment where she actually makes closing the foldable keyboard on the iPad Pro seem cool. Super can't do that, I don't think anybody else could do that. Just like, nope. (Laughing) It just can't.
Here's what I thought
when I watched this video. I thought it's like a
little statement piece that has a kind of an emotional impact but what I didn't expect is how angry everybody got at this commercial. How pissed off everybody was and the thing that pissed everybody
off was that last line. - What you doin' on your computer? - What's a computer? - I hate this commercial.
I get so angry every time I see it. There's a new iPad commercial
where the teen girl on an iPad says, "What's a computer?" And I'm just not ready,
I'm still mourning AIM. - Hey, what are you
doing on your computer? - What's a computer? (Yelling)
(smashing) - That one's funny. (Giggling) Here's what I think that line is saying and why I think it
riled people up so much.
It's saying that the
iPad Pro is so successful at replacing all of those other devices, that it's so clearly
the winner of the future of computing that all of
our old ideas about what a computer is, they're not just wrong they're irrelevant. But hey, it's an ad. It's designed to crack
your brain a little bit. And to be a little bit
provocative and unexpected.
So I have to admit that I kind of love it. (Upbeat music)
Now that doesn't mean that I think that the iPad
is going to take over. But, I do love that it
recognizes that the way that we think about computers is changing. A younger generation
isn't gonna have the same hangups that I have about what a computer is supposed to do and the way I'm supposed to interact with it.
Let me tell you, I have hangups. Like, I really want windows. I mean the boxes you move on a screen not the Microsoft software. I care a lot about windows.
It makes it so much
easier for me to do work. I like to have at least
three active pieces of software open on my
screen at all times. Three of these machines
do that, the Pixelbook, the Surface Pro, and the MacBook Pro. The iPad Pro? No, it doesn't do that,
but the iPad does something that these other machines don't.
It does a killer job
of running a huge suite of great mobile apps. There's just a massive
number of really good, awesome apps that you're
already used to using on your iPhone and
they're here, on the iPad and they work great. But I could go on, the
Pixelbook has windowing and a great browser and great web apps. And the Surface Pro it just has windows with full-on proper windows apps.
And then there's the
MacBook Pro which has the touch bar because Apple doesn't want a touch screen on a Mac
because Apple, I don't know, is completely overthinking this whole what's a computer thing. The point is that all these companies are trying to create
a new kind of computer and they're doing a few
specific things to get there. Well, except the Mac but let's
put that aside right now. I know there's rumors about app frameworks but we're gonna move on.
Just hang with me here, I wanna look at these three computers and
the things that they're doing to invent the future of computing. Number one, these operating
systems are secure and they're basically always updated. The whole idea of Windows
10 is that it's the last version of Windows and Microsoft constantly updates it for you. Chrome OS has the same
thing, you don't even know what version of Chrome you're using, it just gets updated.
Plus, it also offers
fewer vectors of attack for hackers and it's
the same deal with iOS. The word for all this stuff
is managed operating systems and the idea is you don't have to worry about all the stuff you
used to have to worry about with an operating system. They just get updated and secured for you. Number two, these
computers run what I guess we're gonna call modern apps.
So the whole idea behind
S Mode for Windows, it's meant to force apps
to use a more modern coding method that feel
more like tablet apps than those old Windows 95 apps. And I already mentioned iPad
apps, I think they're great. And now Chromebooks can run Android apps, which are less great but they
are slowly getting better. I mean hell, I don't think Google's ever gonna make another
Android tablet ever again.
They're just gonna make up
Chrome OS Tablets for awhile. The point is that all of these systems can run a different kind
of app that are more like mobile apps than they were before. Number three is I think these computers need to run full powered apps. You might call them legacy apps.
So the Surface Pro, for
example, it can just run any full-on Windows app that you want. And the Pixelbook still has
Chrome and so it can run full Chrome web apps that can do almost anything you want as long as you have an Internet connection. Now the iPad Pro, it
can't quite run everything you want but Apple is building up to that rather than starting with that. And finally, number four,
I'm just gonna say it I think that these things need to be able to work as tablets.
It's important that they
have a touch screen. It's important that
they have apps that work in tablet mode and it's
important that you be able to carry them on, touch them directly with your fingers, and even
use a pen if you want to. Now the Mac is the odd duck out here. There are rumors that
Apple wants to find a way to get iOS style apps on this thing but we're just gonna have to wait and see.
(Upbeat music)
So, whenever I travel now I only take one of these
computers with me at a time. And, each has its strengths and each has its pitfalls. Depending on your needs you could be happy with any one of them
as your only computer. But, they all have
trade-offs and none of them do exactly everything that I want.
Every time I use one of
them, I think it sucks like I think the iPad, I
wish it had more windows. I look at the Surface,
I'm like well, the Surface has more windows but
then I use the Surface and I think it's apps suck. And I'm like, well the
web apps on the Pixelbook aren't great and round
and round and round we go. Nobody's put it all together
yet and you know what? That's frustrating
watching these companies try to find the future of computing while all of us ourselves
are trying to define what we want from the future of computing could make anybody irrationally angry.
And, hey, maybe that irrational anger might just come out of some precocious, smart kid just kind of casually asks, "What's a computer?" Hey everybody, thank you
so much for watching. If you like this video, I'd appreciate it if you hit the like button
or even the subscribe button. That would be cool and let
me know in the comments if you had to pick one of these computers to be your only computer for
the next couple of years, which one would it be? And be honest, tell me also what you think you'd miss out by picking that computer. I'll hang out in the comments for a while and we'll have a chat..
Bye Scout! See you tonight. Water-thin, can't get in.
What you runnin' for? Okay show me,
I wanna see it. Check it out. Oh dude.
What did your mom say? There he is. I'm sending it to him. What is it you wanna know?
Where is it you wanna go? Filling your head up,
it won't get better till your filling your head up.
Filling your head up, Thank you. Filling your head up.
Where is it you wanna go? Where is it you wanna go? Hey! Hey. Watcha doin'
on your computer? What's a computer? .
Do you remember when you first realized that your computer was more than just a monitor and keyboard? That between the mouse click
and the video playing, there was something
that captured your intention, understood it, and made it real? What is that something? Is it gremlins? Let's imagine that we can shrink down to the size of an electron and inject ourselves
into a click of a mouse. If you took your mouse apart, you'd see that it's really
a very simple machine. It has a couple buttons and a system for detecting
motion and distance. You might have an optical mouse that makes these measurements
with lights and sensors, but older ones did this
with a hard rubber ball and some plastic wheels.
Same concept. When you click the button on your mouse, it sends a message to the computer with information about its position. When your mouse click is received, it's handled by the basic
input/output subsystem. This subsystem acts like the eyes and ears and mouth and hands of the computer.
Basically, it provides
a way for the computer to interact with its environment. But it also acts like a buffer to keep the CPU from being
overwhelmed by distractions. In this case, the I/O subsystem decides that your mouse click is pretty important so it generates an interrupt to the CPU. "Hey, CPU! Got a click here." The CPU, or central processing unit, is the brains of the whole computer.
Just like your brain doesn't
take up your whole body, the CPU doesn't take
up the whole computer, but it runs the show all the same. And the CPU's job, its whole job, is fetching instructions from memory and executing them. So, while you're typing, typing, typing, maybe really fast, like 60 words a minute, the CPU is fetching and executing billions of instructions a second. Yes, billions every second: instructions to move your mouse
around on the screen, to run that clock widget on your desktop, play your internet radio, manage the files you're
editing on the hard drive, and much, much more.
Your computer's CPU
is one heck of a multitasker! "But oh my gosh there's a very important mouse click coming through now! Let's drop everything now
and deal with that!" There are programs for everything that the CPU does. A special program for the mouse, for the clock widget, for the internet radio, and for dealing with letters
sent by the keyboard. Each program was initially
written by a human in a human-readable programming language, like Java, C++, or Python. But human programs take up a lot of space and contain a lot of unnecessary
information to a computer, so they are compiled and made smaller and stored in bits of ones
and zeros in memory.
The CPU realizes that it
needs instructions for how to deal with this mouse click, so it looks up the address
for the mouse program and sends a request
to the memory subsystem for instructions stored there. Each instruction
in the mouse device driver is duly fetched and executed. And that's not nearly
the end of the story! Because the CPU learns
that the mouse was clicked when the cursor was over a picture of a button on the monitor screen, and so, the CPU asks memory
for the monitor program to find out what that button is. And then the CPU has to ask memory for the program for the button, which means that the CPU needs the monitor program again to show the video
associated with the button, and so it goes.
And let's just say there
are a lot of programs involved before you even see
the button on the screen light up when you clicked it. So, just the simple task
of clicking your mouse means visiting
all of the critical components of your computer's architecture: peripherals, the basic input-output system, the CPU, programs, and memory, and not one gremlin..
Whazz up guys? I am Wajahat Ahmad and this is our new tutorial on networking, we are going to show you how you can connect two PC's with each other using Lan Cable Let me introduce myself I am Waqas Ahmad Wajahat's YouTube partner And today we are working on tutorial and I'm helping out Wajahat on his Networking Tutorial So we have two Laptops Fujitsu and uh... IBM, both have Win 7
Operating System 64bit Operating System installed and there's also a Networking Cable Of course we will do the Networking Sharing VIA a Networking Cable Now!! We are going to connect the Lan Cable with one PC. Like this make sure it is connected properly, and.. Now connect the other End with your 2nd PC like this Now I'm here at the PC 1 and i want to share my E:\\ Drive in my
computer so just make sure that you disable
your Wifi at both PCs and uh...
To share my drives,
What I would need, I would need to enter the IP Settings for that so I will access the Open Network and Sharing Center and that i would go to local area connection
that is my Lan connection right now as you can see uh.. Then I will access the properties and then the internet protocol version 4 properties so here you can see uh.. The IP Address are automatically set right now
here, but for that.. For now we need to enter the IP.
And what i would enter keep in mind that as we are not using internet so that uh... IP should not uh.. It can be valid, but it is actually not
necessary. We can enter invalid IP's as well for now I'm entering "192.168.1.20" You press the tab button and it will automaticly enter the sub net mask now I just don't think so that I need to fill up the rest of these That is Default gateway, Preferred DNS Server, Alternate DNS Server just leave it here like that So now we are at PC 2 and I would do the same here at this PC as well but i would enter different IP.
But not totally different, but similar uh let me just show you here doing the same exact things if you remember uh.. At the PC 1 I entered
"192.168.1.20" But this would make these both addresses of this PC the same as we know in our daily life the different Residentials can't have the same address so.. We would try something different. A little
different so this is here "21" you press the tab button again and press OK.
Now our PC's are connected to each other so now as you want to share this E:\\ Drive so I would do I would access the properties of this Drive and uh... The I will access the Sharing tab here and I would then go into the Advance settings Advance Sharing make sure you mark this "Share this folder" and uh.. In permissions it is up to you how much
control you want to give it to the other pc user right now i'm giving it full control
so that when the other guy accesses this disk drive he has a full uh.. He/she has a full control over it.
He can delete the data, he can read ir and modify the data whatever he wants. OK. So if I. Unmark this full control and If I just mark the Read so that you just don't want
to let other users ruin your data or other users modify your data so this option is meant for you then but right now i'm using a full control option So I'm applying it here "OK" uh..
Sometimes users get a problem umph with the security when they access
it from other user it gives some kind of error make sure that you have added "Everyone" to here in security group of users who can access your PC. If it is not added what you will do, you will go to Advanced settings the you will Change Permissions and you will add and uh... And again you will access the Advance menu and you will find with whom you want to share your data there would be "Everyone" here like this and if the "Everyone" user is not added into your security then you will click the OK button but right now i'm not going to do that
as "Everyone" is already added there. So this is it.
Now i'm going back to the other PC. So now we are almost done now access the start menu and type double Slash \\ and the IP of the PC 1 that is "192.168.1.20" You click this button you will get your E:\\ Drive shared the drive you have shared I click this and this is my data at the other PC. Now anddd for example I want to copy a Movie Furious 6. Let's copy this.
Ctrl + C. I can even cut this folder now, as you know I have given a full control to this PC user Cross this session and CTRL + V. And you can see it's 930 MB of data and it is transferring the data at 10 Mbps Speed now if you share your data VIA wifi. It would transfer your data at 1 Mbps transfer speed so that is a kind of very slow thing so I would suggest you: share your data VIA
Networking cable so this is how it works Thanks for watching our video and uh please Subscribe to our Channel and leave a comment if you have any problems.
Hello and welcome to the EasyPCBuilder.Com build video my name's Brett and I'll be showing you through the build process today. Now, whether you're here to expand on a hobby learn something new, or save 30% to 50% off of retail by building it yourself they're all great reasons, and I'll help show you through that today. Now, why do you want to listen to me? I started building computers at a young age as a hobby and it's now turned into my profession. I've got a degree in Computer
Engineering and 15 years experience in the field Now I certainly don't claim to know it all,
but if you learn a thing or two then that's great.
So what are we building with today? We've got our power supply, our motherboard, our hard drive our Solid State Drive, our RAM. A CPU, a high-performance graphics card, an aftermarket heatsink a DVD burner and an anti-static wrist strap Now, if you want a full description of all
the parts that we suggest to use in a build like this head over to the website at EasyPCBuilder.Com where you'll find the monthly updated Parts Guides, which outline the best components to buy to get the best Value, Performance and
Reliability our of your Build. A large amount of
consumer and engineering research goes into these and they're also available for other
builds too, such as Gaming PC's at various levels, Media PC's & Home Office PC's also... And they're awesome! Now I'm using an anti-static wristband
as I build today.
This really should be a requirement as you build If you don't use static protection you may
not completely break anything but you do run the chance of shortening the life of your components by them sustaining partial damage from static events for the small cost of an anti-static strap, I'd really recommend it. Now to ensure that you're appropriately grounded to earth you should do the following: unpack
the case and the PSU before unboxing or touching any of your other components, install the power supply into the case,
now you'll notice a fan on the bottom of this particular model which feeds air into the PSU. Where you have an intake and filter in the bottom of the case install it this way, as it will help you draw cool air, in and through the case. *Excellent hand motions* Now on the back of the case, you'll see four mounting points that you need to fasten.
Now ensure that the PSU power switch is
in the OFF position this will cut any potential power supply
as the earth bypasses this switch as it is direct wired. These days with painted cases, your strap won't conduct to earth properly unless you find an unpainted surface to attach to. So I've attached the wrist strap to a non-painted conductive area, by using a riser as a
connection point to ensure good continuity to ground. When the build is finished we simply remove this and put the normal mount in But as the thread in this riser interfaces directly to the earthed PSU casing it is the best path available with a painted case like this.
Now doing all of this will ensure that I'm as close to relative ground as possible which is the best potential to be at
when working with components. Having yourself attached to a non-earthed case is still better than nothing but as the case cannot completely dissipate your passed charge you're likely floating at some voltage higher than 0V. And still have the potential to damage components (pun intended). Also, We'd recommend doing the build on tiles or hardwood floors where you can as it's hard to build up static.
And don't pat your curious pets while you're building and have a clean, non-conductive work area to work on. Insert the power cord for the PSU. Into an earthed wall socket which is
turned OFF and then plug the other end of the cable into TURNED OFF power
supply. So, for the mean time, we'll just leave the
case and the power supply as they are and now that I'm appropriately earthed and static free, we can get to installing some of our other components.
Seriously, buy a wrist strap. They're $5. So here on the motherboard we've got our CPU array, we have our four CPU *cooler* mounting points we have our CPU fan header, our RAM slots we have our PCI Express and PCI slots we have our 24 pin power primary connector, we have our 8 pin secondary CPU power connector we have our USB 2.0 Headers, our USB 3.0 Headers our case interface header for switches and LED's we have our 6x motherboard mounting points on this side of the motherboard we've got our 6x SATA Data headers, and on the opposite side here, we've got our audio, USB. Display, HDMI, USB and ps/2
connectors for the back interface to the case.
So now lets install the CPU. Now you may have heard of 'zero insertion force' with respect to CPU installation. This refers to the placement of the CPU. Not the actual holding plate which holds the CPU in place.
To remove this, you take the arm out, up and back which will expose the CPU array. Now, on the CPU array, there are two notches here and here these correspond to the CPU. Here and here. Now they're asymmetrical, so the CPU.
Will only mount in one way. As you see, I'm holding the CPU by the sides, never from the face or from the back of the pins. Never touch the CPU array either. So to place the CPU, grab it top and bottom and place it down into the CPU array.
Low height, NO WORRIES. Now to fold the mounting place back over, we need to ensure that the arm is back fold the plate over and down under the the mounting point there and now it's usually at this point here that you hear a few unwelcome creaks and sounds I'll be quiet for a second so hopefully
we can pick them up in the sound eek.. Now in placing the arm back down you do
have to exert some force this is perfectly normal if the CPU is
placed in the correct orientation and seated flat. So it's the same just as we uninstalled it, arm out down and under and that's your CPU installed.
Remember to like, share and subscribe!! So now we're going to install the RAM. Now we're jumping to this now as we're doing an
aftermarket CPU cooler install and we need to make sure that everything
fits first so you may notice that we have four RAM slots here now each *pair* of these represent a channel on this particular chipset of the motherboard and in order to run in 'dual channel'
configuration which means the memory data controller bus will be twice as wide this also means you can get more data
through and shorter time frame this helps aid performance and is quite
simple when you consider you just have to buy and install the RAM in the
correct configuration to take advantage of it. So to install the RAM, you fold these slots back (note read the FAQ below regarding the slots chosen) We have our RAM module here, now you'll notice that the notches on these are actually asymetrical so if we attempted to install the RAM in
this particular orientation the notch on the slot and the notch on the RAM stick won't fit. And if you flip it around, they line up and we're fine.
So to install the RAM. Put it in like that and then a vertical force downward a minor bit of force, and It'll go down and clip in that's one and the secondary and that's got your RAM installed So now it's time to install our aftermarket CPU cooler. You see here when I place the cooler there aren't actually any mounting points currently on the motherboard which support this cooler itself. On the board here are the stock Intel mounting points for their OEM CPU cooler What we have to do is install the additional manufacturer bracket to the board which supports the additional mass of the heatsink that we're installing.
On the back we have the backing plate, on the front we have some through hole parts here. Now as this is specific to each manufacturer, I'm not going to show this process on the video and I'll pre-install this and then we'll
get to installing the heatsink itself So now that we've got our aftermarket CPU. Mounts installed and on the back here
we've got backing plate now should mention here that this
backing here is actually an insulator. It's meant to be on there
so don't remove it.
They are also on the underside of the other
four mounts on the motherboard that you see here So now it's time to figure out what orientation is best for our CPU cooler the fan intake is through the front of the case, so we've got the bottom of our case here and the back here and what we want is for the air to draw in through the front, exhausting out the
back and top fans of our computer case So you may have noticed that there is no thermal paste on the CPU or the aftermarket cooler that we're using today to ensure the correct operation of the
computer, we'll need to install this. So you may have noticed that most aftermarket coolers do not come with thermal paste supplied You cannot miss this step. If you do you'll
have problems with overheating, crashing and inconsistent temperatures on the
chip, shortening its life the thermal paste only fills very small air gaps between the two surfaces the paste is much better at heat transfer than air is so what we're going to do here is install a half pea size bit of thermal paste on the CPU. Please read the FAQ for any questions surrounding this.
Link below Now we're going to grab our CPU cooler now it's very important to make sure that you only exert up and downward force on this you never want to place it sideways or at an angle when you're sure that you're getting your placement correct, you place it straight down, on the CPU so the two plates come into contact with each other at pretty much the same time. And check your mounting points, and if you're happy with how it's all situated you can start screwing these items down. Please like, share and subscribe! Now ensure that when you're fastening your heatsink down that you go in a diagonal pattern and evenly spread the force of the fasteners down while you're attaching the heatsink. This is quite important to ensure that
your thermal paste is distributed evenly as you do it up *turbo time* So now that's all fastened down it's time to move on to installing the fan.
So on the side of the fan here, you'll see that there's two arrows one of them indicates the air flow through the fan, what we want to do here is if this is the bottom and this is the
back of the case, we want the air to flow through the CPU cooler an exhaust out the back and top. So the
why we have this oriented that the air will suck through the fan here through the CPU and exhaust out the back and the top of the case. Slot it on, ensure it's clipped in firmly and you're in business. Now what we have here is a 4-pin CPU fan connector that we're going to plug into the motherboard.
4-Pin allows for variable speed to be
controlled from a closed loop system which means that the fan speed can be
controlled by your motherboard which is determined by the temperature
of your CPU. The PDF Build Guides are very helpful. Buy one today! Now it's time to install our motherboard into the case. Now if we have a look at the back of the motherboard, you'll see we've got a whole lot of through hole parts which are conductive if these touch the back of the case, which is also conductive your motherboard or other components won't enjoy it (they'll have a holiday, indefinitely.) So what we need to do is provide an insulating air gap in the form of a riser as seen here Now, looking at the motherboard, we need to find our through hole mounting points on this particular board we have six
mounting points which need to correspond to what you
install inside the case or what has already been pre-installed.
Now the method that I'm using for determining the distance from the mounting points is the very scientific thumb method. This method works quite well for me but for a more accurate way to identify the locations We suggest putting a suitable size piece of paper under the board and tracing the mounting holes through, then mount the risers with respect to
this. To check correct placement when you've installed the risers, you can
place the piece of paper on top and push the risers through your paper to ensue that they are all placed as you've traced them. Check that the quantity and placement of your risers correspond to your motherboard now there may be other riser positions under the board here which correspond to different
motherboard configurations.
By ensuring that you only have the correct number in the correct place, the support should
be adequate for your board install. Watching this at a College or University? Email us and let us know where you're from! Now after the motherboard mounts are lightly tightened up we need to ensure they're installed securely, the manufacturer has provided a special tool to tighten their risers, so we'll utilise this today to tighten these up to an adequate tightness then, just to check all to ensure that they're seated well and tightened correctly. So now before we put the motherboard down into the case, there's one thing which I've forgotten many times earlier, which is the motherboard backing plate here, which installs down here for the rear motherboard access points. Now, if we see on the board, the plate can install in two orientations.
We need to check that it all corresponds
by comparing it to the board itself, so when we know we have the right configuration just bring it down, ensuring that everything else is out of the way, and then with a small force, click the backing plate into place in the case. There are usually four clicks that you'll hear when installing this. Now that the backing plate is installed, we can grab our motherboard, usually try to support the board by both
the heatsink and by hand to install the board into the case the
best method is to install it with the rear of the board down first making sure that the board lines up well
with the rear mounting plate mount and the motherboard mounts also. And then the motherboard is ready for install So then we're on to mounting the motherboard.
There are specific screws to do this, so check your case manual, and then install the motherboard screws in a diagonal fashion, loosely at first, until you have all in place, to ensure you don't torque the motherboard if not initially mounted correctly. Then, when you happy with their placement completely do them up and you're in business. So at the front of the motherboard, we've got the case interface header, this header usually has installed the power and reset switch points, and an interface to both the hard drive and
power LED's. Now as your LED's are diodes, they need to be installed in the correct polarity, but your switches don't necessarily matter as the switch just shorts the two pins together.
So we'll plug in our Power LED one here, which requires positive to positive and negative to negative, check your
motherboard manual where the header is hard to read. Then we have our power switch our reset switch and then our Hard Drive LED interface keep note of the polarity of the LED's and check that they correspond to that of your motherboard header. And as you see here, as a general rule of thumb, all of your motherboard case header connectors plug in with the text facing outward, but do check your motherboard manual to confirm. Here are your SATA Data headers, for your interface to your hard drives, solid state drives, DVD drives and
other devices.
On this particular board, the cream ones our our 6Gb/s connectors, and these are our 3Gb/s connectors. The recommended configuration will be having the faster ports for our HDD's and SSD's and the lesser bandwidth ports (3Gb/s) for our DVD drive. So now we're going to install our Solid State Drive, Hard Drive and DVD drive into the case. Now, for airflow through the case, I'm going to remove this upper drive bay as we're not going to be utilising it in this case, we'll be using this bottom part here (to store our drives) So I'll just unbolt this here and slot it out This enables the airflow from the fan in the front to flow through unobstructed.
Time to install the Solid State Drive, now this case that I'm using today comes with easy release drive bays we need to install our drives in a particular facing direction though so as you'll see the power and data connection points here we're going to be installing it in this orientation we can access the cables from the back of the case, and it allows for a clean, unobstructed
air path, with proper cable management from the other side of the case. For this
particular solid state drive we have four holes in the bottom of the
drive itself which we just need to screw in through to mount. Again, screw in diagonally, and your Solid State Drive is installed. Then the same for the Hard Drive, now, we're mounting our hard drive using the bottom mounting points However the hard drives also have side mounts, which is just as valid to install with.
Again, just checking that our data and power ports are in the correct orientation for cable management, to
slot in, and then install the screws nice and firm, and slot it into the case. Now it's time to install the DVD drive. At the front of the case, you'll find some plates which are removable to enable installation of the drive usually to remove them, you'll find these
two tabs at the back of the plate which you need to squeeze together to push the main cover forward, and out of the case. To install the DVD drive into the case, insert it from the front of the case slotting it in until it's flush with the front of the case.
Then, on the side of the case you'll see the through hole mounting points on the case two on this side, which we'll install with the provided thumb screws. As there are several mounting points on the side of the case, ensure that the drive still remains flush as you install. And then do the same, on the other side of the case. This is your 24 pin power connector and your primary power interface to your motherboard.
It helps facilitate the motherboard on board logic powers the motherboard, and some of the
devices which are connected to it. This 6 pin plug here is your supplementary power connector for your Graphics Card this is due to the motherboard not being able to supply the required power to the card itself The 6-pin connector allows an additional 75W to be used by the card per connector installed and as your usual (Graphics) card uses between 150 and 200 Watts you'll likely need to install this for your GPU. You can also see here that you can can change this cable on this particular power supply to 8 pin configuration which allows a 150
watts per connector to be used. Noting this though: The 8 pin PCI-E Supplimentary power connector and the motherboard CPU power connector, as shown on the right, are not the same power connectors, their power pinout is different, and even though they are keyed differently, these should never be forced into their slots due to having the same number of pins.
This is a legacy Molex power adapter which is becoming somewhat obsolete in new builds. You may find older hard drives use these or where you have an older power supply, you may be able to use these to power your Graphics Card with additional
adapters. This is your SATA power connector, which connects to your Hard Drive, Solid State Drive, and DVD Drive. Note, that it's notched on the left hand side, and that it can only be installed in one orientation.
These are your SATA Power and Data connectors. Power on the left, Data on the right. They are both notched and will only install in one orientation. The Data connector will plug in to your HDD, SSD and DVD Drive to facilitate the data transfer.
So what I've done here, is pre-routed the cabling for the case. So we have the relevant cables left out for install, and the rest have been routed through and concealed on the back of the case to facilitate better airflow. I've pre-installed the motherboard to
case interface headers where their wires are ran concealed behind the back of the case. We have our SATA Data connectors connected here, so on the 6Gb SATA (which are the white ones) we have installed our SSD and behind that our HDD.
And on the 3Gb SATA ports we have our DVD drive. What we've also ran through here, are our two PCI-E power connectors, for our graphics card. Our USB 3 Header here And our 24 pin motherboard power connector. Now what we'll do is install our 24-pin
motherboard power connector you'll see here there is retaining clip on
the connector which corresponds to the notch on the
motherboard here, so all you have to do is insert it vertically, with a minor bit of force until it clicks, and you're installed.
Now we have our USB 3 Header Connector. Which is also notched, to be
connected. We're leaving our two PCI-E power connectors out here for the meantime, and now we
move on to the CPU power connector on the motherboard. The last one to install here on the motherboard, is the power connector for the CPU.
It consists of 8 pins and 4x 12V rails to adequately power the CPU's requirements. It is notched with a retaining clip, the same as the 24pin motherboard connector, and installs in a similar manner. Now on the back of the case, we have to install the power and data connectors for a hard drive solid state drive and DVD drive. Firstly, install the SATA power connector for the hard drive, ensuring it is in the correct orientation, and then for the SSD.
Now to installing our SATA Data connectors. One for each firstly for the hard drive and secondly
for the solid state drive. As these are our most consistently used data transfer devices we want them plugged into the fastest interface ports on the motherboard which were the 6Gb ports for this (SATA)
standard that we're building with. Now for the case fans.
This particular
case came with a fan controller which allows us to voltage control the
fans in the front, top, and rear of the case. There is
controllable switch on the top here and what we have here is a Molex power
connector which is used as a primary feed to the
fans. Connect this up as an output from the fan controller, we
have these three outputs for each fan of the case. We'll now plug in
the front, top, and rear fans into the output of the
fan controller.
As the fans supplied are only three pin
fans where your motherboard doesn't support the voltage control of the fans they would run consistently, at full speed
within your case which would have them running faster
than necessary, reducing their life and creating unnecessary audible noise. Tidy and secure the routed cabling
at the back of your case, and then install the opposite side panel
back on to the case. So now it's time to install the Graphics
Card. You'll see that we have three PCI-Express
slots installed on this board the topmost slot is predominantly the one
that we wish to use.
Now you can use two in SLI configuration,
but today as we only have one card we'll be installing in the top my slot as
we can be assured that it will have the full 16x PCI-E data channels ran to it. The Graphics Card that we're using today uses two interface slots at the back of the case, one for the interface, and one for secondary heatsink output. So we'll need to remove these backing plates before installing the card into the case. The slot on the motherboard has a notch which you'll need to either push down or to the side before installing the card into the case.
You need to push this down prior to
removing the card if you ever need to uninstall it from the case. So now we're going to bring the card in
for installation. Remove any items protecting the interface pins, ensure the Graphics Card is installed level and upright, and you'll feel it click into place, and seat on the motherboard. Install your two screws, to retain the card.
Finally, install your supplementary power connectors into the card, to ensure it has output power to function reliably. And there you have it! As we're not installing any other components in this build, we're finished inside the case, so we can remove our static protection insert our final retaining screw for our Power Supply and turn our Power Supply on, ready for our first boot. So now it's time to power it up. Fans are spinning now we're just waiting for our BIOS screen We've got POST.
Now it should search for a boot drive And that's exactly what we expected to see. So if you want to know what the best parts are to build with you can obtain the Parts Guides from EasyPCBuilder.Com These represent a significant amount
Engineering and Consumer research where we outline and explain, in technically understandable terms, the best components to build with, and
why, that enable you to get the best value, performance and reliability out of your build. So, if you want to get on board and complete your own build learn heaps, and achieve something new? Jump over the web site at EasyPCBuilder.Com and check them out. Thanks for watching! Watch now: How to install your Operating System with EasyPCBuilder!!.
[Whoosh] [ding] [upbeat music] one, two, three, four My name is May-Li Khoe and I'm a designer and an inventor. [Music] So some of the things I've designed have been at Apple, and now I design products for kids to use so that they can have an easier time in
school. My other jobs include DJ-ing and dancing. [Electric guitar music] Computers are everywhere! They're in people's pockets, they're in people's cars, people have them on their wrists.
They might be in your backpack right now. But what makes a computer a computer? What does make a computer a computer anyway? And how does it even work? [Electric guitar music] Hi I'm Nat! I was one of the original
designers of the Xbox. I've been working with computers since I was maybe seven years old and now I work on virtual reality. [Electric guitar music] [electric guitar music continues]
(off-screen speaker): Eat those donuts.
[Electric guitar music continues]
[laughter] [electric guitar music continues]
(off-screen speaker): Get them. Get them! [Electric guitar music] As humans, we've always built tools to
help us solve problems. Tools like a wheelbarrow, a hammer, or a printing press, or a tractor-trailer. All of these inventions helped us with manual work.
Over time, people began to wonder if a machine could be designed and built to help us with the thinking work we do, like solving equations or tracking the
stars in the sky. Rather than moving or manipulating physical things like dirt and stone, these machines would need to be designed to manipulate information. [Music] As the pioneers of computer science explored how to design a thinking machine, they realized that it had to perform four different tasks. [Music] It would need to take input, store information process it and then output the results.
Now this might sound simple, but these four things are common to all computers. That's what makes a computer a computer. [Upbeat piano music] The earliest computers were made out of
wood and metal with mechanical levers and gears. [Upbeat piano music] By the 20th century, though,
computers started using electrical components.
These early computers were really large and really slow. A computer the size of a room might take hours just to do a basic math problem. [Upbeat piano music] (voice from TV broadcaster): These machines are things of gleaming, varied colored metal and numerous flashing lights. [Typewriter sounds] Computers started out as basic
calculators, which was already really awesome at the time, and they were only manipulating numbers back then.
But now we can use them to talk to each other, we can use them to play games, control robots, and do any crazy thing that you could probably imagine. [Music] Modern computers look nothing like those clunky old machines but they still do these same four things. [Electric guitar music] First, we're going to talk about input. This is my favorite because what input is is the stuff that the world does or
that you do that makes the computer do stuff.
You can tell computers what to do
with the keyboard, you can tell them what to do with the mouse, the microphone, the camera. And now if you're wearing a computer on your wrist, it might listen to your heartbeat or in your car, it might be listening to what the car is doing. And a touchscreen can actually sense your finger, and it takes that as input on what it's doing. [Synthetic keyboard music] All these different inputs give a computer
information, which is then stored in memory.
[Whoosh] A computer's processor takes
information from memory. It manipulates it or changes it using an algorithm, which is just a series of commands. And then it sends the processed information back to be stored in memory again. This continues until the processed
information is ready to be output.
[Synthetic keyboard music] How a computer outputs information
depends on what the computer is designed to do. A computer display can show text, photos, videos, or interactive games -- even virtual reality! The output of a computer may even include signals to control a robot. And, when computers connect over
the Internet, the output from one computer becomes the input to another, and vice versa. [Synthetic keyboard music] The computers we use today look really different from the earliest thinking machines.
And who knows what the computers of tomorrow will be
like? My hope is that you get to help decide what you want the computers of tomorrow to look like. But across all computers, regardless of the different types of technology they use, they're always doing those same four things. They take in information, they store it as data, they process it, and then they output the results. [Music] [music fades].
[Upbeat music] Hi! My name is Limor Fried, and I'm an
engineer here at Adafruit Industries. And this is where I do engineering and
design, and I design circuits for fashion and music and technology. [Music] My name is Federico Gomez Suarez, and I'm a software developer with Microsoft Hack for Good. And I look into using technology to help us solve some of the big social problems of our times.
[Music] You may have heard that computers work
on ones and zeros. Or you may have seen scary-looking visuals like this. But almost nobody today actually deals directly with these ones and zeros. But ones and zeroes do play a big role in how computers work on the inside.
Inside a computer are electric wires and circuits that carry all the information in a computer. How do you store or represent information using electricity? Well, if you have a single wire with electricity flowing through it, the signal could either be on or off. That's not a lot of choices, but it's a really
important start. With one wire, we can represent a yes or no, true or false, a one or zero, or anything else with only two options.
This on/off state of a single wire is called a bit, and it's the smallest piece of information a computer can store. If you use more wires you get more bits: more ones and zeros. With more bits you can represent more complex information. But to understand that, we need to learn about something called the binary number system.
[Music] In the decimal number system, we have ten digits from zero to nine, and that's how we've all learned to count. In the binary number system, we only have two digits: zero and one. With these two digits, we can count
up to any number. Here's how this works.
In a decimal number system we're all
used to, each position in a number has a different value. There's a 1 position, the 10 position, the 100 position, and so on. For example, a 9 in the 100 position is a 900. In binary, each position also carries
a value.
But instead of multiplying by 10 each time, we multiply by 2. So there's the 1 position, the 2 position, the 4 position, the 8 position, and so on. For example, the number 9 in binary is 1001. To calculate the value, we add 1 times 8, plus 0 times 4, plus 0 times 2, plus 1 times 1.
Almost nobody does this math because computers do it for us. [Music] What's important is that any number can be represented with only ones and zeros, or by a bunch of wires that are on or off. The more wires you use, the larger the numbers you can store. With 8 wires, you can store numbers between 0 and 255.
That's 8 ones. With just 32 wires, you can store all the way from 0 to over 4 billion. [Music] Using the binary number system,
you can represent any number you like. But what about other types of
information? Like text, images, or sound? It turns out that all these things can also
be represented with numbers.
[Jazz music] Think of all the letters in the alphabet. You could assign a number to each letter. A could be 1, B could be 2, and so on. You can then represent any word or paragraph as a sequence of numbers.
And as we saw, these numbers can be stored as on or off electrical signals. [Electric guitar music] Every word you see on every webpage or your phone is represented using a system like this. [Electric guitar music] Now, let's consider photos, videos, and all the graphics you see on a screen. All of these images are made out of teeny dots called pixels, and each pixel has a color.
Each of the colors can be represented with numbers. When you consider the typical image has
millions of these pixels, and the typical video shows 30 images per second now we're talking about a lot of data here. [Music] Every sound is basically a series of
vibrations in the air. [Music] Vibrations can be represented graphically as a waveform.
Any point on this waveform can be represented by a number. [Music] And this way, any sound can be broken down into a series of numbers. If you want higher quality sound, you will pick 32-bit audio or an 8-bit audio. More bits means a higher range of numbers.
[Music] When you use a computer to write code or make your own app, you're not dealing directly with these ones and zeros. But you will be dealing with images or sound or video. So if you want to understand how computers work on the inside, it all comes down these simple ones and zeros and the electrical signals in the circuits behind them. [Music] They are the backbone of how all computers input, store, process, and output information.
In many ways,
our memories make us who we are, helping us remember our past, learn and retain skills, and plan for the future. And for the computers that often act
as extensions of ourselves, memory plays much the same role, whether it's a two-hour movie, a two-word text file, or the instructions for opening either, everything in a computer's memory
takes the form of basic units called bits, or binary digits. Each of these is stored in a memory cell that can switch between two states
for two possible values, 0 and 1. Files and programs consist of millions
of these bits, all processed in
the central processing unit, or CPU, that acts as the computer's brain.
And as the number of bits needing
to be processed grows exponentially, computer designers face
a constant struggle between size, cost, and speed. Like us, computers have short-term memory
for immediate tasks, and long-term memory
for more permanent storage. When you run a program, your operating system allocates area
within the short-term memory for performing those instructions. For example, when you press a key
in a word processor, the CPU will access one of these locations
to retrieve bits of data.
It could also modify them,
or create new ones. The time this takes is known
as the memory's latency. And because program instructions must be
processed quickly and continuously, all locations within the short-term memory
can be accessed in any order, hence the name random access memory. The most common type of RAM
is dynamic RAM, or DRAM.
There, each memory cell consists
of a tiny transistor and a capacitor that store electrical charges, a 0 when there's no charge,
or a 1 when charged. Such memory is called dynamic because it only holds charges briefly
before they leak away, requiring periodic recharging
to retain data. But even its low latency
of 100 nanoseconds is too long for modern CPUs, so there's also a small,
high-speed internal memory cache made from static RAM. That's usually made up
of six interlocked transistors which don't need refreshing.
SRAM is the fastest memory
in a computer system, but also the most expensive, and takes up three times
more space than DRAM. But RAM and cache can only hold data
as long as they're powered. For data to remain
once the device is turned off, it must be transferred
into a long-term storage device, which comes in three major types. In magnetic storage,
which is the cheapest, data is stored as a magnetic pattern on
a spinning disc coated with magnetic film.
But because the disc must rotate
to where the data is located in order to be read, the latency for such drives is 100,000
times slower than that of DRAM. On the other hand, optical-based storage
like DVD and Blu-ray also uses spinning discs, but with a reflective coating. Bits are encoded as light and dark spots
using a dye that can be read by a laser. While optical storage media are cheap
and removable, they have even slower latencies
than magnetic storage and lower capacity as well.
Finally, the newest and fastest types of
long-term storage are solid-state drives, like flash sticks. These have no moving parts, instead using floating gate transistors that store bits by trapping
or removing electrical charges within their specially designed
internal structures. So how reliable
are these billions of bits? We tend to think of computer memory
as stable and permanent, but it actually degrades fairly quickly. The heat generated from a device
and its environment will eventually demagnetize hard drives, degrade the dye in optical media, and cause charge leakage
in floating gates.
Solid-state drives
also have an additional weakness. Repeatedly writing to floating gate
transistors corrodes them, eventually rendering them useless. With data on most current storage media having less than
a ten-year life expectancy, scientists are working to exploit
the physical properties of materials down to the quantum level in the hopes of making
memory devices faster, smaller, and more durable. For now, immortality remains out of reach,
for humans and computers alike..
So we saw how the Mac used 30 pin SIMS like this to store its memory And we'll look later at what sort of information the computer stores in these things But for now, I just want to look at how this actually stores information. Now as I'm sure all of you are aware, it stores it in terms of binary digits or bits But actually what we are really interested in [is] just storing a single bit and we can put them together to form lots of memory. So to understand how the memory works, we need to look at some of the basic digital logic circuits we can build using logic gates. Now over on Numberphile, Matt Parker introduced these using dominoes to create various things We're going to look at them in terms of the electronic chips So you can buy your basic logic circuits in integrated circuits like this.
This one's four OR gates. So [incomprehensible], you put them together in an electronic circuit to build memory Now this is a bit odd because normally these are just used to process or combine various inputs but if we connect them in a specific way, we can actually get them to store information at least until the power is turned off. So what we've got here are two very basic electronic circuits. We've got an AND gate here, and an OR gate in this chip, here.
These chips come with four AND gates or four OR gates together And if we remember from the Numberphile video, an AND gate is on when both of its inputs are on. If either input if off, then the output is off. So in this case, I wired it up to a simple L.E.D., So that we can see the output of one of the AND gates. And I've wired both of the inputs to the positive voltage rail because we use positive five volts to represent TRUE or one in binary and we use ground, or zero volts, to represent false or zero in binary.
Now. That's generally what we use with what was called TTL logic. These days you use different voltage levels and so on, but the principle is the same; you have one voltage which represents FALSE, or zero, and another voltage which is generally higher that represents one, or TRUE. So if I take...
Hang on. If I just move these over so you can see what I'm doing. So both of these are currently connected to logic 1, or five volts. If I disconnect one and connect it to logic zero, you can see that immediately that light goes off, because the AND gate has now got one input zero, one input at one, one and zero is zero by the laws of boolean algebra.
So we can combine these in different ways, And [incomprehensible] back in one, both one, it's on. Put them both to zero, then they're both off. Over here, I've got an OR gate. And if you remember back from the Numberphile video, an OR gate is on when either of its inputs are on, or both of them are on.
So I'm gonna to rewire the circuit to do that. So often you'll get books like this which will give you details of different things. The quad input positive OR gates has inputs on pins one and two and the output on pin three. The AND gate, the 7402, has the inputs on pins two and three, and the [output] on pin one.
So, connect the output to pin three. And we can now start to connect the inputs. Now in both cases... Woops! I just shorted the uh...
Oo. Ha Ha. *Laughing" I just shorted the uh... [BRADY]: A little bit hot? [GUY]: Yeah.
Just shorted the power supply which is why it's making noise. So we connect both of these to... The cable's all melted! ...Pin zero. And if we now unplug that and plug it into there, Have I just broken everything? [BRADY]: You fried the chip! [GUY]: I hope this gets edited out Yeah.
So that's right. Um. I've either fried everything on here... [BRADY]: Are you now turning it off and on again? [GUY]: I am indeed turning it off and on again, here, in the hope that I haven't just shorted everything out.
Uum. [BRADY]: Shall we pause there? [GUY]: Yeah. I think we might need to pause it. Ha ha ha ha.
Smoke's cleared, and we've just had a slight problem with power supply but we're back and running now. There's a little hamster running around in a wheel to power everything at the moment. So we've rewired this so that the output of the OR gate is now connected to the L.E.D. And these are both tied to logic zero through these resistors here.
If I now connect any of these to logic one, the input comes on. So that's input two connected to logic one. Input one, the input comes on. And of course because it's an OR gate, if I connect the second input at the same time, then they're both on.
We also get other versions of these chips. And these are called NAND gates or NOR gates. And they work in exactly the same way. They two inputs and they AND them together but immediately following that, build into the chip, is what's called a NOT gate, which inverts the output.
So it's the opposite of an AND gate. Its output is off when both of its inputs are on. So I'm-gonna-open this up. There we are.
So-I'm-gonna take the AND chip out. There we are! And pop this chip in. It can be a pain because you have to bend all of the legs to fit in. There we go.
So that's now in place So-I-gotta rewire it now to use a NAND gate that I've popped in there. So I connect the output to pin three of this circuit. And the L.E.D. Of course comes on, because both inputs one and two are wired to zero.
Normally an AND gate would be off because both of its inputs are zero But this is the opposite of that so both of its inputs are zero, it's now on. So if we connect input two to five volts, it stays on because zero and one is zero. There inverse of that is one. But if we connect input one as well to five volts, then the L.E.D.
Goes off. Because one and one is one, the opposite of that is zero, so the L.E.D. Is now off. But as soon as we disconnect one of the pins, it comes back on.
And one of the fascinating things about NAND gates is that you could build a whole computer just using the circuits on this chip. You'd need lots of them. You'd need more than four. But what we are going to do today is use, not a NAND gate to start with, but a NOR gate, which is an OR, then NOTed.
To actually build some memory. So over here, here is one I prepared earlier, we have quad input NOR gate. So-this-is four NOR gates So-what-I'm-gonna do is wire two NOR gates into a circuit so that it'll actually store the information that we put in it. I'm gonna use this one on the left here.
And this one over here. Let me just check the wiring diagram We have pins one is the output of the NOR gate. Two and three are the inputs. And on the other side, pin thirteen is the output in pin eleven and twelve.
So I'm gonna connect the output of this NOR gate on the right hand side to the input of the one on the left hand side [BRADY]: Shall we call them A and B or..? [GUY]: Yeah. So we connected the output of NOR gate B to the input of NOR gate A. And-now-I'm-gonna connect the output of NOR gate A back to the input of NOR gate B. It's a very tight fit so...
There we go. So we've got these two things crossed over, but the output of one is connected to the input of the other. And just to make sure the circuit works, I'm just gonna put some resistors to tie the other input to zero volts to our logic zero. This means that I can make them logic one or logic zero just by touching the leg of the resistor with a wire connected to five volts later in the demonstration So the other thing I'm gonna do is I've connected the output of NOR gate A to this wire here.
And I'm just gonna put a L.E.D. Across that wire to ground like so. And I'm gonna to the same on the other side. So I'll connect that up like so.
There. And well see that this L.E.D. Has now come on. So I now get a fly wire, plug this into five volts like that.
And if I touch this one, this L.E.D. Comes on, and it stays on. If I touch that one, that L.E.D. Goes off and this one comes on, and stays on.
This circuit is remembering its state. And we can do that by just driving a signal into the chip. And it'll stay like that until I turn the power off. We need to look at how this circuit works.
What-I'm-gonna do is draw it out. But before we do that, it would be useful to refresh out memory of how a NOR gate works. Ah. So that's a NOR gate and it has two inputs which we'll label as a and b and it has an output which we'll label as q.
So we can build a truth table for this. So normally with an OR gate, zero OR zero would be zero. But we're inverting it because it's a NOR gate. So the output is one.
Zero or one is one, but it's inverted so the output is zero. One or zero is one, but it's inverted so the output's zero. One or one is one, inverted, so the answer is zero. So that's the truth table for our NOR gate.
Now let's have a look at the circuit that we used over there. So we had our first NOR gate and we also had our second NOR gate, like that. And we've got the inputs to these like so. And we took the output from here and connected it to the input of that one.
And we took the output from here and connected it here. We've now got two inputs left that we're not using and I gotta label them as R. Because that is what we use to reset it. And we've got S which is what we used to set it, or to store a bit.
We've also got two outputs. And I'm gonna label the first one q and the other one we're gonna call this NOT q. And the way we do that is is we draw a line over the top to say that this is NOT q. Now the thing we have to remember about these circuits is that they don't switch the output instantaneously when the inputs switches.
There is a slight very short delay. And depending in what kind of chip you get... But there is always a slight delay. So-what-I'm-gonna do is I'm gonna draw out our truth table for this So we've got input R, and we've got input S, we've got output q, and output q NOT q.
But these are also inputs to this. So I'm actually going to put in q prime and NOT q prime. To start with, this is at zero, this is at zero. We don't know what these values are, so we'll leave them blank.
What's the next value of q going to be? So it's going to be zero, OR'd with the current value of NOT q, NOT'd, so that's gonna be represented as q NOT q, NOT'd. NOT q, NOT'd is of course q because the two NOTs cancel out. So the value of q prime is whatever the old value of q was effectively. Same happens for NOT q prime.
That's s, which is zero. OR'd with the old value of q, NOT'd so we get NOT q. So as long as the two inputs are zero, you get the same values propagating through the circuit. But what happens if we set s to be one.
We'll leave r at zero. So our new value of q is gonna be the old value of NOT q OR'd with zero So it's gonna be NOT NOT q again. So it's gonna be q. Our new value of NOT q is gonna be s, which is one, OR'd with whatever the value of q was, NOT'd.
Now if you OR anything with one, if you think about the truth table, the answer is always one. So NOT q is going to be zero because it's NOT of one. So we're gonna get a zero in there. So we can feed those back in again We've still got zero and one as the input here We now know that the output of q bar, or NOT q, is zero.
So what's the new value of q gonna be? Well, it's the output of NOT q, which is zero OR'd with zero NOT'd which is one The output of q prime is going to be one and the output of q bar prime... Well that's still one OR'd with whatever the output of q was before. So we'll call that q, that's always going to be one, NOT'd, so that's gonna be zero. And if we run those values through again...
So we've got zero, one, one zero. Then we get the same values out: one, zero. But the interesting thing is, when this becomes zero, and that becomes zero again, q is still at one, NOT q is still at zero If we run the circuit through here, the new value of q is the old value of NOT q OR'd with zero that's zero, NOT'd, that's one. And NOT q prime is S, which is zero, with the old value of q, which was one, and that's one, NOT'd, that's zero.
So it stays the same, and you get the same input coming through. So it actually continues. And we could do the same thing with the reset, and you'd find if you work it through, that it resets it and all of the values go to zero. So that very simple circuit will actually store the state if it is set and if it is reset.
And you can actually build up a complete memory circuit because you can put some very simple digital logic in front of that to generate the right s or r signal based on the value of a bit and whether you want to store it or not. [LEFTVIDEO]: ...And everybody was gonna click on that one. Well it turned out that the video behind that was a person talking about the fight [RIGHTVIDEO]: Only that will fall over, that wont move. Here we go! Ready?.
Theres just something about a nice clean
black and white setup that I really enjoy. Combine some of the thinnest bezel monitors
in a dual screen setup. And a little bit of cable management to hide
most of the clutter. And youve got yourself a great baseline
to make your own dream desk setup.
Hi Im David and this is the ultimate dual
screen desk setup While Im a big fan ultrawide monitors,
for pure productivity purposes I find dual monitor setups just a little more convenient
to use with the additional screen real estate and easier to manage window organization. For the best possible dual monitor setup I
chose the Dell U2717D monitors. For pure productive and aesthetics, these
monitors in a dual configuration are my top picks. Covering the basic specs of this monitor,
its a 27 inch, 2560x1440 resolution 60 Hz IPS-type (Samsung PLS) monitor.
But what makes these monitors ideal for my
setup is the physical design. The borders measure just under 8mm on the
top and sides, and is only a tad thicker on the bottom edge. Branding is kept to a minimum with the small
Dell logo on the front , so theres not much to distract you whether watching a video
or browsing the web. And while the monitor stands that come with
these Dells are nice, I prefer to use their VESA mounting capabilities with a monitor
arm.
I chose to use the VIVO Dual Monitor Arms
(Stand-V002M) and I find it looks and works great for putting together a dual monitor
setup. Some caveats that I noticed when assembling
it though. The quick release plates are really thin and
dont work well with the recessed VESA mounts these Dell monitors (VIVO does include spacers
and extended screws, but the screws were too long and even if I found proper screws I didnt
like how it looked) so instead I just installed the quick release plate on the arm, bent it
upwards and then place the monitor on top while screwing it into place. Also looking at the arm from the top you can
see that in my configuration the arms need to protrude slightly to the back if I want
to keep my monitors close to the edge, this means I need pull my desk out a bit from the
wall to keep this setup from hitting it.
The clips are a little flimsy so be careful
to not snap them and theres also this VIVO. Branding on the tube of the arm that isnt
the nicest looking but you can rotate it to the side by 120 degrees so you barely notice
it from the front. But overall it holds both of the monitors
nicely in place. Having two 27 inch monitors is really wide
in my case it spans just over 120cm wide and my desk is only 160cm wide, so it barely gives
me enough space to fit a pair of speakers.
Im using the Edifier R2000DB speakers here
for this setup. Im not audiophile but these speakers sound
really good to me with their 5 inch woofers and 1 inch tweeters. But I think they might be a little too big
for this design, or maybe I just need a longer desk. But for now Im pretty happy with this setup.
Cable management is also a must. Hiding all your cables underneath in an IKEA
signum rack is a quick and effective way to store your spiderweb of cables. I also just hide my computer underneath here
because I dont like it taking up space on my desk. (Yes it is on carpet)
And finally on top the basic peripherals.
While not everyone might agree with my choice
of keyboard and mouse. A large mouse pad is definitely handy for
this dual monitor setup. Sometimes its just more convenient to shift
my attention to a single monitor. And then Slide the mat to the left, or to
the right depending on the monitor Im working on.
Or out of the way completely if I need space
on the desk for other tasks. While the Satechi mat that Im using here
is a nice option just be aware it does have an issue with the edges curling up over time,
so youll might need to curl them back once in a while to make it look straight again. So thats my dream setup for the ultimate
dual monitor computer desk. While a little barebones and basic.
It gives me a lot of desk space and screen
real estate to do whatever work I need to do. And this can easily be customized in the future
to my personality with some extra artwork. But hope you guys enjoyed this one. You know what to do.
 Hi, Im Carrie Anne, and welcome to CrashCourse
 What's up, guys? I'm Jamila Mustafa
 - So here's a question, what's a computer? - What's a computer? - Now I know it's really a huge question and it's also a really obvious question. We all kind of know what a computer is. So I have a better question, which is what is a computer going to become in the next couple of years? A bunch of companies are actually trying to evolve what we think of as a computer and I've been using all
 Bye Scout! See you tonight. Water-thin, can't get in.
 Do you remember when you first realized that your computer was more than just a monitor and keyboard? That between the mouse click
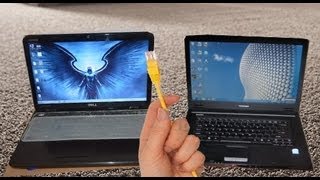 Whazz up guys? I am Wajahat Ahmad and this is our new tutorial on networking, we are going to show you how you can connect two PC's with each other using Lan Cable Let me introduce myself I am Waqas Ahmad Wajahat's YouTube partner And today we are working on tutorial and I'm helping out Wajahat on his Networking Tutorial So we have two Laptops Fujitsu and uh... IBM, both have Win 7
 Hello and welcome to the EasyPCBuilder.Com build video my name's Brett and I'll be showing you through the build process today. Now, whether you're here to expand on a hobby learn something new, or save 30% to 50% off of retail by building it yourself they're all great reasons, and I'll help show you through that today. Now, why do you want to listen to me? I started building computers at a young age as a hobby and it's now turned into my profession. I've got a degree in Computer
 [Whoosh] [ding] [upbeat music] one, two, three, four My name is May-Li Khoe and I'm a designer and an inventor. [Music] So some of the things I've designed have been at Apple, and now I design products for kids to use so that they can have an easier time in
 [Upbeat music] Hi! My name is Limor Fried, and I'm an
 In many ways,
 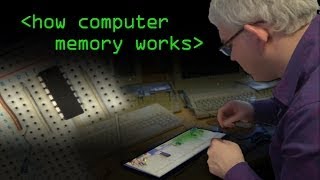 So we saw how the Mac used 30 pin SIMS like this to store its memory And we'll look later at what sort of information the computer stores in these things But for now, I just want to look at how this actually stores information. Now as I'm sure all of you are aware, it stores it in terms of binary digits or bits But actually what we are really interested in [is] just storing a single bit and we can put them together to form lots of memory. So to understand how the memory works, we need to look at some of the basic digital logic circuits we can build using logic gates. Now over on Numberphile, Matt Parker introduced these using dominoes to create various things We're going to look at them in terms of the electronic chips So you can buy your basic logic circuits in integrated circuits like this.
 Theres just something about a nice clean